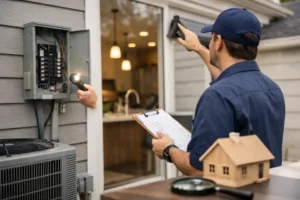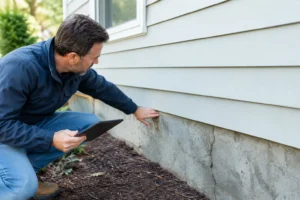
A buyer walkthrough after inspection is where the report becomes a real-world decision tool. You are not returning to the property to repeat the entire inspection or search for cosmetic imperfections. You are there to verify that agreed-upon work is complete, confirm the home’s condition has not materially changed, and make sure you understand what you are accepting before closing.
For buyers, this step can feel rushed because it often happens shortly before settlement. A focused plan keeps the walkthrough useful. Bring your inspection report, repair agreement or addendum, a phone or camera, and a notebook. If questions arise, clear documentation and timely communication are far more useful than relying on memory.
Understand What the Walkthrough Is For
The final walkthrough is typically your last opportunity to see the property before ownership changes hands. It is not a replacement for a professional inspection, and it does not guarantee that every system will operate perfectly after you move in. Its purpose is narrower and more practical: confirm the property is in the agreed condition and verify that negotiated repairs or seller obligations have been addressed.
Start with the inspection findings that influenced your negotiations. If the inspection identified active moisture, electrical concerns, aging equipment, roof damage, plumbing leaks, or safety issues, those items deserve specific attention. Compare the property to the written repair agreement rather than a verbal recollection of what someone said would be fixed.
A repair request may be resolved in several ways. The seller may complete the work, offer a credit, reduce the purchase price, or decline the request. Your walkthrough should focus on the resolution actually documented in the contract. If you accepted a credit in lieu of repair, do not expect the repair to be complete. If the seller agreed to hire qualified professionals, ask for invoices, receipts, permits where applicable, and any transferable warranties.
How to Prepare for a Buyer Walkthrough After Inspection
Review your inspection report before arriving, ideally the night before rather than in the car. Mark items that were negotiated, items that were not negotiated but still require awareness, and areas you want to see again. High-resolution inspection photos can help you locate the same component or condition quickly.
It also helps to separate concerns into two categories. The first category is repair verification: Was the agreed work performed, and does it appear complete? The second is property condition: Has anything changed since the inspection, such as a new leak, removed fixture, damaged wall, or inoperable appliance? Keeping these questions separate prevents a minor cosmetic concern from distracting you from a material issue.
Schedule enough time to move deliberately. A small condominium may require less than an hour, while a larger home or one with extensive repair negotiations may need more time. If the seller is still moving out, consider whether the property can be adequately evaluated before furniture, boxes, and vehicles are removed. Hidden areas are difficult to verify when access is blocked.
Verify Repairs With Evidence, Not Assumptions
A new-looking patch, painted surface, or replacement cover does not always show whether the underlying concern was corrected. Focus on observable results and supporting documentation. For example, if a plumbing leak was reported, look for dry surrounding materials, proper operation, and evidence of professional repair. If an electrical issue was identified, confirm that the agreed correction was completed and request documentation from the contractor.
Some repairs are easy for a buyer to observe. A missing handrail may now be installed, a broken window may be replaced, or an inoperable exhaust fan may function properly. Other repairs require more technical confirmation. Work involving concealed wiring, roof coverings, heating and cooling equipment, drainage, or moisture conditions may warrant a reinspection by a qualified inspector or the original specialist who evaluated the concern.
Do not assume a repair is satisfactory because it appears recent. Ask whether the work addresses the original issue, whether the repair was completed by an appropriate professional, and whether any related damage remains. A fresh coat of paint can improve appearance, but it should not substitute for correcting an active water source.
Check the Home as It Will Be Delivered
Once you have reviewed negotiated repairs, walk through the property as a future owner. Operate accessible systems in a reasonable manner and look for changes that may have occurred after the inspection. Turn on lights, run water at sinks, flush toilets, test accessible windows and doors, and check that built-in appliances included in the sale are present and operating.
Pay close attention to areas that may have been concealed during the inspection or affected by the seller’s move-out. Open cabinets under sinks, look behind appliances if accessible, inspect garages and storage areas, and check for new wall damage, missing fixtures, or abandoned belongings. If the property includes outdoor equipment, gates, irrigation controls, sheds, or other included features, verify they remain on site unless the contract says otherwise.
Use a short, organized checklist for the final pass:
- Confirm all agreed repairs and obtain supporting invoices or warranties.
- Verify included appliances, fixtures, remotes, keys, and access devices remain at the property.
- Test readily accessible lights, outlets, plumbing fixtures, doors, windows, and major appliances.
- Look for new leaks, damage, debris, or conditions created during move-out.
- Photograph concerns and record their location before leaving.
You do not need to test every outlet or operate every system for an extended period. The goal is to identify visible changes, incomplete obligations, and obvious operational issues that call for follow-up before closing.
Know When a Reinspection Makes Sense
A reinspection is most valuable when the original report identified significant concerns, multiple repairs were negotiated, or the completed work cannot be meaningfully evaluated during a standard walkthrough. It can also be appropriate when repairs involve conditions that were hidden behind finished surfaces or when documentation is incomplete.
The timing matters. Arrange a reinspection early enough for findings to be reviewed and addressed before closing. Waiting until the final hour can limit your options and add unnecessary pressure to an already demanding transaction.
A professional reinspection does not certify every repair or guarantee future performance. It provides an independent, documented assessment of visible and accessible conditions at the time of the visit. That distinction matters, particularly when a repair appears acceptable on the surface but raises questions about workmanship or whether the original defect was fully addressed.
Archer Professional Inspections approaches follow-up evaluations with the same emphasis on clear evidence and practical decision support as the original inspection. A detailed assessment can help buyers, agents, and attorneys communicate about remaining concerns with more precision than a verbal description alone.
What to Do if You Find a Problem
If you identify an incomplete repair, missing item, new damage, or condition that concerns you, document it immediately. Take clear photos and video, note the room and location, and compare the issue to the inspection report or repair agreement. Then notify your real estate agent promptly so the concern can be raised through the appropriate transaction process.
Avoid authorizing work yourself before discussing the issue with your agent and reviewing the contract. Depending on the situation, the parties may agree to complete the repair, provide a credit, hold funds in escrow, adjust the closing timeline, or use another documented solution. The appropriate response depends on the purchase agreement, the seriousness of the issue, and the time available before closing.
Keep communications factual. “The agreed bathroom exhaust fan replacement is not installed” is more useful than “The seller did not do anything.” Specific observations, photos, and repair documents create a clearer path to resolution.
Keep the Walkthrough Focused on Your Decision
No home is flawless, including a well-maintained property. The purpose of a buyer walkthrough after inspection is not to eliminate every future maintenance responsibility. It is to confirm that you are receiving the property and negotiated terms you agreed to, with no avoidable surprises at the closing table.
Walk in prepared, rely on written evidence, and give extra attention to the items that shaped your purchase decision. A calm, methodical review can turn the final visit from a stressful formality into one more layer of protection for the investment you are about to make.